
This shop is part of a social shopper marketing insight campaign with Pollinate Media Group® and Sharpie, but all my opinions are my own. #pmedia #PaintYourWay http://my-disclosur.es/OBsstV
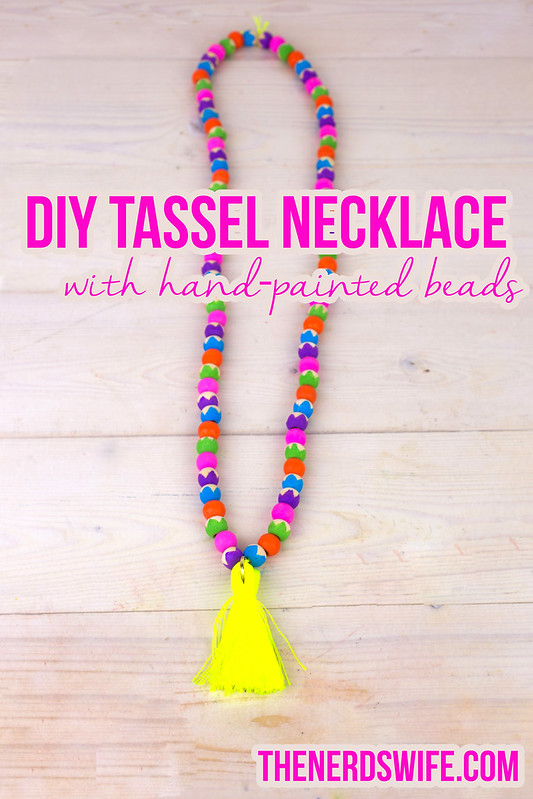
One trend this summer that I have been LOVING is the long tassel necklaces everyone has been wearing. I wanted to put my own twist on this trend, though, so I created this DIY Tassel Necklace with hand-painted wooden beads using Sharpie Paint Markers.
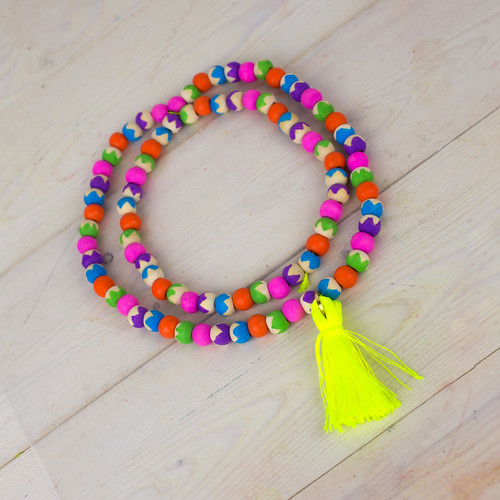
I love how bright and colorful my DIY Tassel Necklace turned out — the neon yellow tassel really makes it pop! And I was able to use a variety of colors so that it will look great with lots of different outfits.
I shopped at Michael’s for the supplies for this project. Make sure to look out for great deals on Sharpie Paint Markers at Michael’s stores.
DIY Tassel Necklace With Hand-Painted Beads
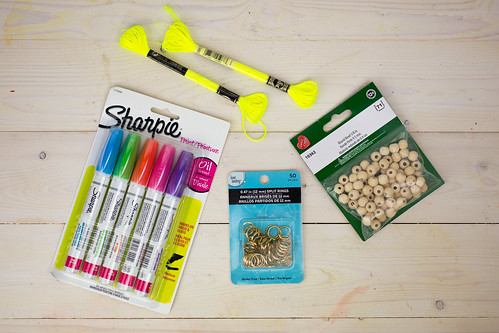
Supplies:
Sharpie Paint Markers in assorted colors
2 skeins of embroidery thread
1 split ring
About 100 wooden beads
Scissors
Directions:
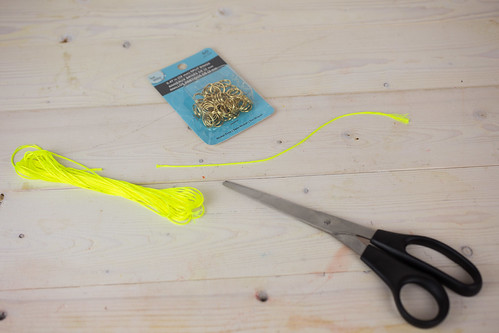
Remove one of the skeins of thread from the package, but make sure to keep the shape. Cut a small piece of thread from the end of the thread, about 5 inches long.
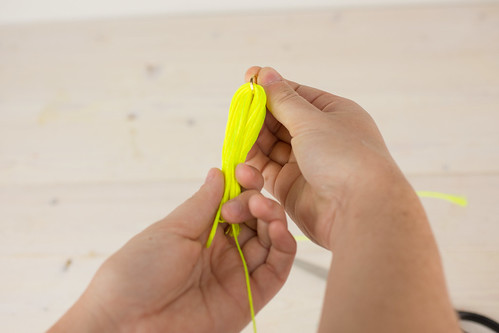
Insert one end through the split ring and fold it in half.
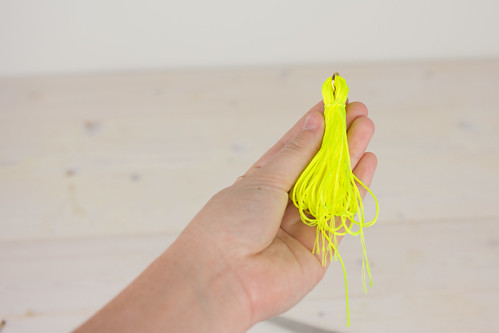
Tie the small piece of thread around the top of the thread.
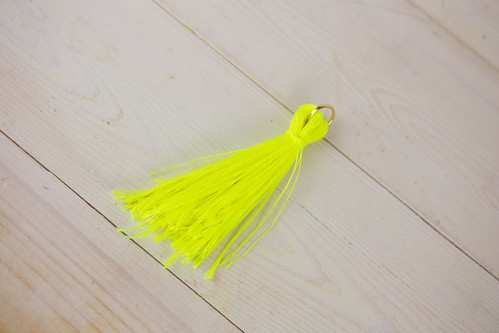
Cut the ends to create a tassel. You can leave the ends long, or trim them up a bit to make a shorter tassel.
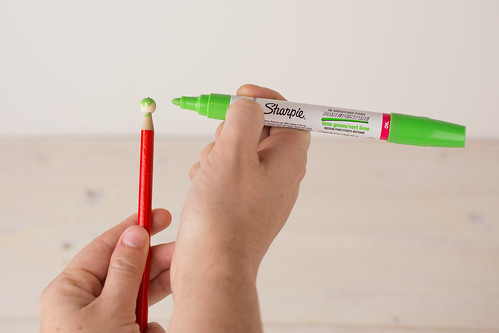
Using the Sharpie Paint Markers, paint the beads. I painted a zig-zag design using three colors and painted the entire bead with the remaining two colors. I used a sharpened pencil to hold the beads while I painted them.
Since I had 5 colors, I decided to create a pattern using 20 beads in each color.

String the beads onto a piece of the remaining skein of thread. Halfway through, add the tassel onto the necklace. I also rotated the direction that I was stringing the patterned beads at that time, so that they would appear to be going the same direction.
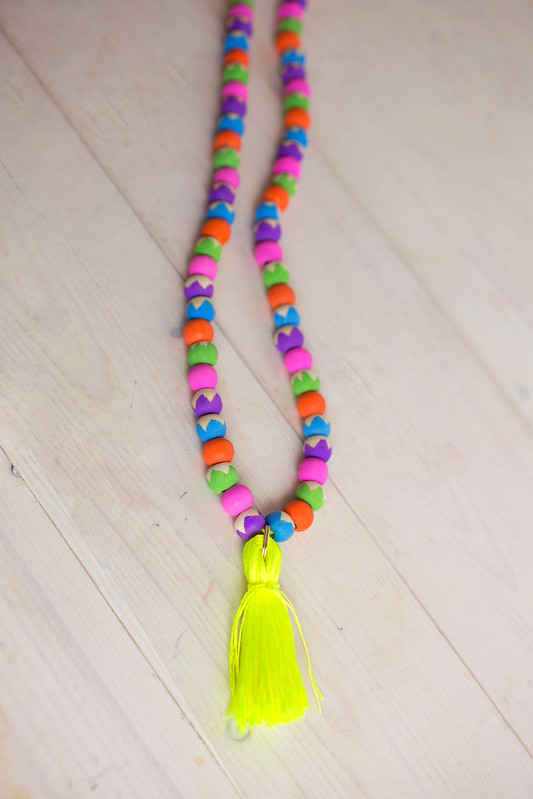
When you’re finished stringing the beads, tie off the end of the necklace. You could also use a jewelry closure to ensure that it remains closed.
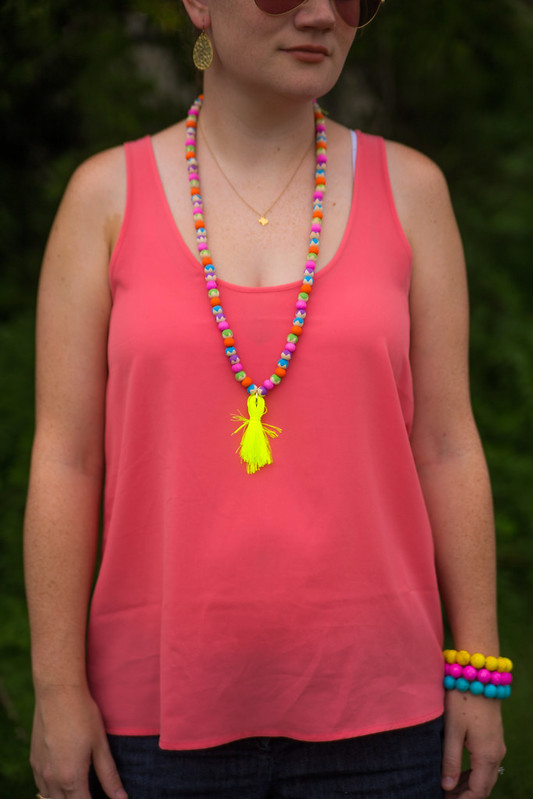
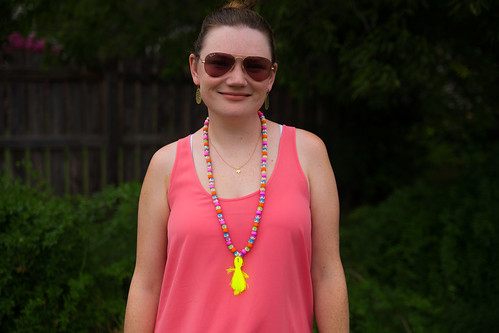
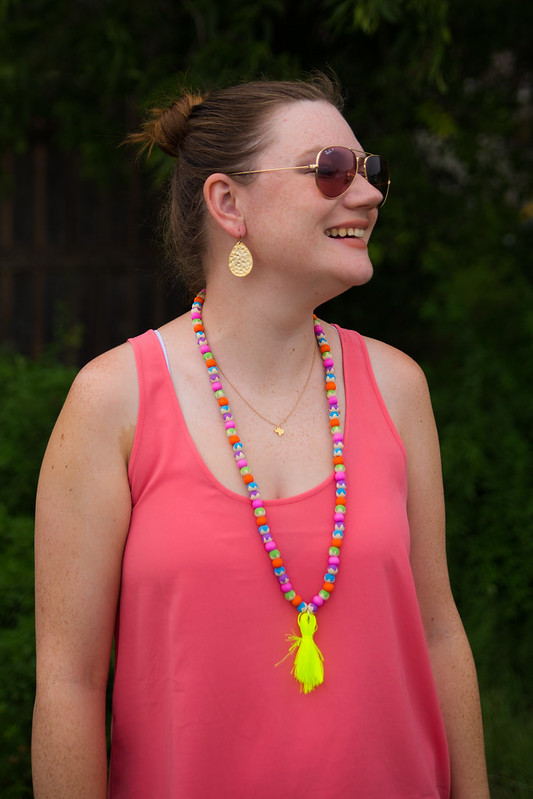
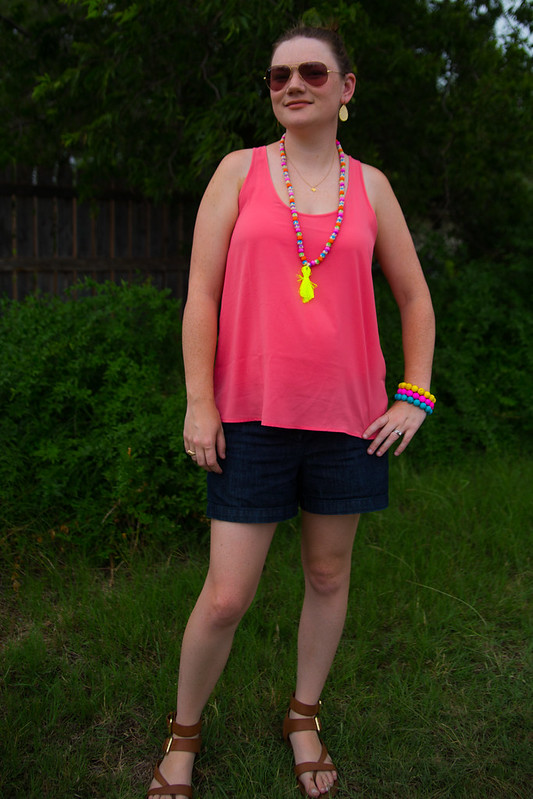
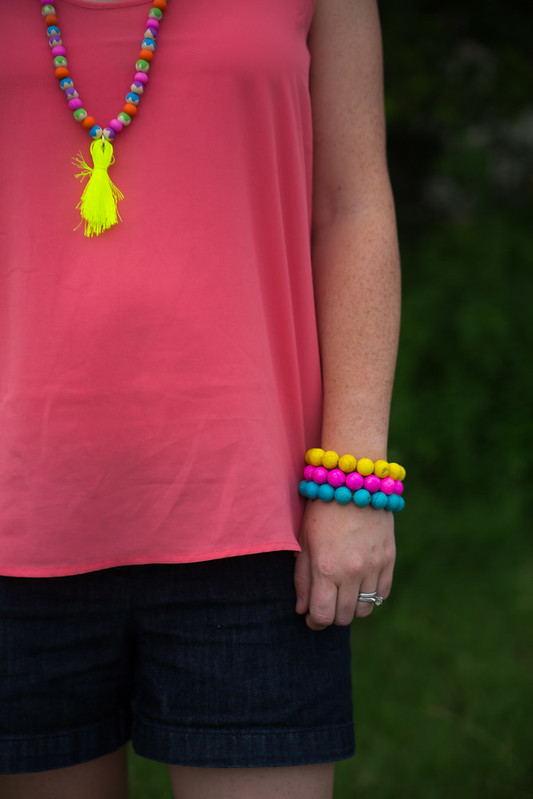
Style with your favorite bright colors!
Be sure to check out Sharpie on Facebook and Twitter for other fun projects!
How would you wear your DIY Tassel Necklace?
Ok..i am on the way to store so I can make this. LOVE it!
YAY! So glad, April! <3
Absolutely love the idea of adding a personal touch to accessories. The colorful beads and tassel give off such a playful vibe. Definitely adding this to my crafting list.
Roadside Assistance near Cleveland
As players progress to more geometry dash advanced levels, the visuals become increasingly complex, incorporating lighting effects, animations, and transitions that enhance the overall experience. Despite its relatively simple graphical foundation, the game manages to deliver a visually captivating experience that keeps players engaged.
Hi there! I just finished reading your DIY tassel necklace article and I really enjoyed it. The way you explained each step made the whole process feel simple and fun, even for someone who is not very crafty. I especially liked how you broke down the materials and showed how small details can make a big difference in the final look. Your creativity really shines through, and it gave me the confidence to try making one myself at home. It is always refreshing to see projects that are both stylish and budget-friendly.
Also, I appreciate how approachable your writing style is—it feels like getting advice from a friend rather than reading a tutorial. The finished necklace looks beautiful and versatile, perfect for different outfits. By the way, as someone who works closely with a White-Label SEO Agency, I can say content like this is not only helpful but also highly engaging for readers searching for DIY ideas. Keep sharing such amazing projects, I will definitely be coming back for more inspiration.