
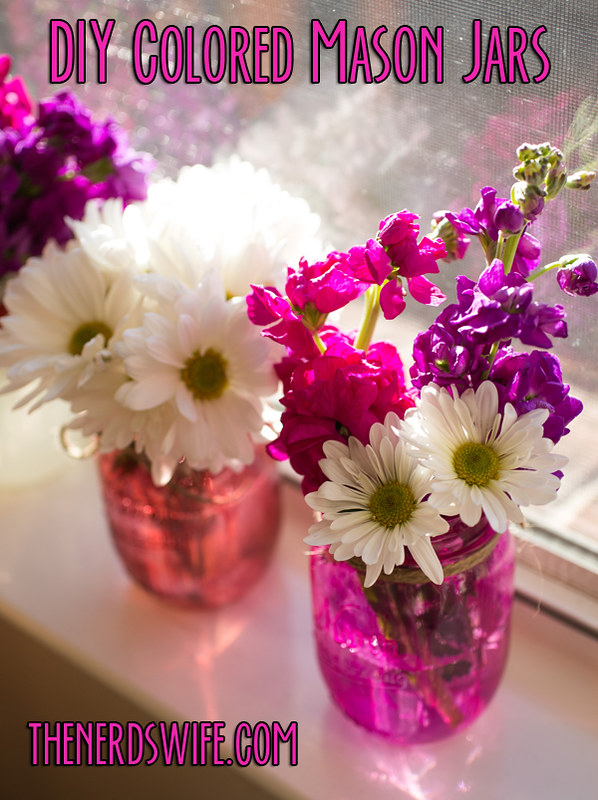
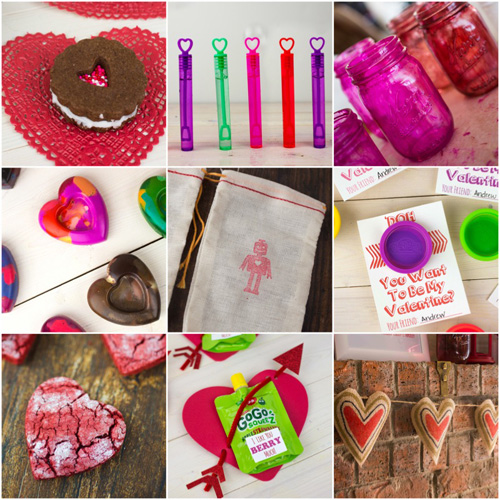
Lately, I’ve been obsessed with mason jars. I have so many and am constantly collecting more. They have such a rustic, vintage feel that I love decorating with them. But a few weeks ago, I got to thinking — what if you could dye mason jars? And so these DIY Colored Mason Jars came to be.
I did some research online, and while there are many tutorials for using food coloring and Modge Podge to color mason jars, I wanted something a bit more permanent. I decided to use glass paint to color my mason jars. I wanted to do Valentine’s Day colors, and I’m really happy with how they turned out!
I plan on taking a painted jar with fresh flowers to each of Andrew’s teachers at school. This is such an easy and inexpensive project, and I just know they’ll love them!
DIY Colored Mason Jars
Supplies:
Clear Glass Mason Jars (These are my favorite!)
Pebeo Vitrea 160 Glossy Glass Paint
Pebeo Vitrea 160 Glossy Glass Paint Thinner (optional)
Sponge Paint Brush
Directions:
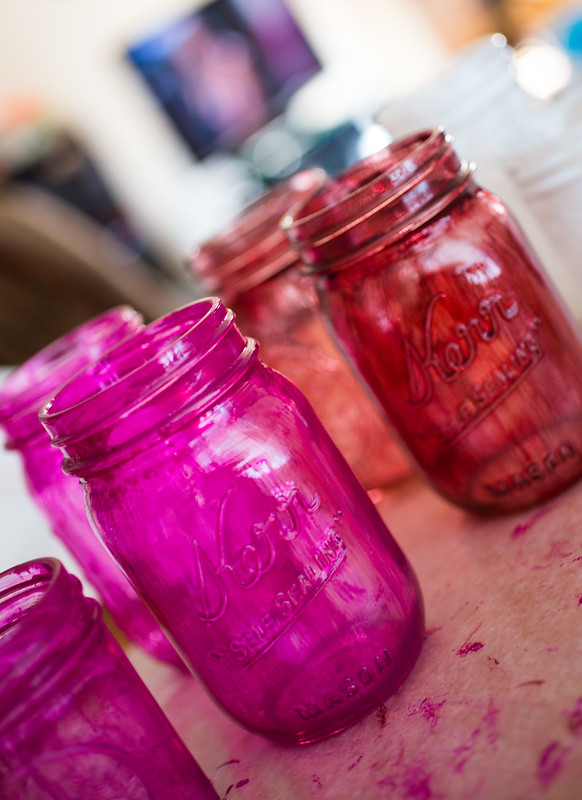
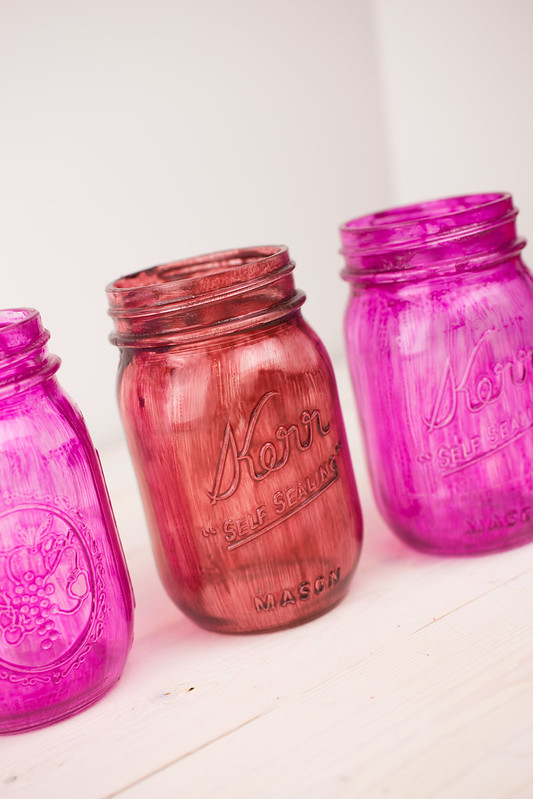
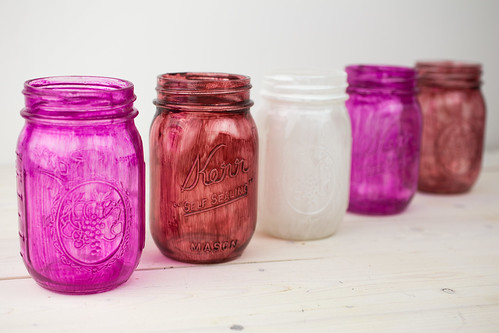
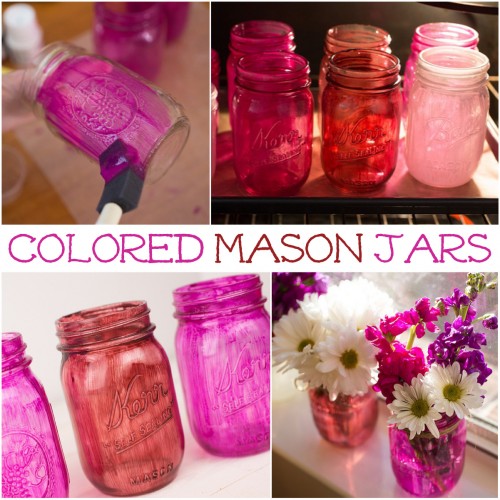
I decided to go with three colors of Pebeo Vitrea 160 Glossy Glass Paint: Bengal Pink, Indian Red, and Veil White.
The Bengal Pink was a bit too dark and thick, so I added some glass paint thinner and really liked how it looked. I wasn’t really impressed with how the white turned out, but I really liked the pink and red jars.

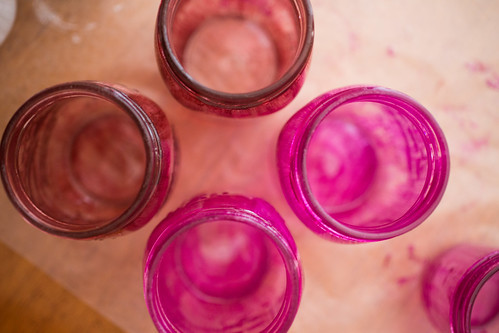
Dilute the paint with the thinner, if desired. Paint the outside of the jars using the sponge paint brush, trying to even out any streaks or drips along the way.
Allow to air dry for 24 hours.
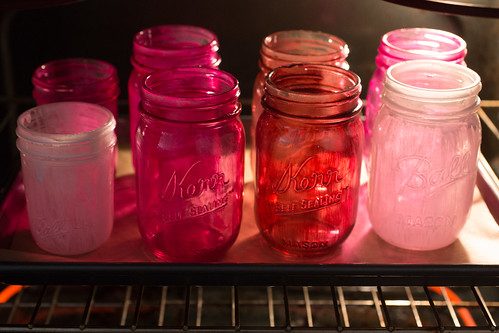
Cure in the oven by baking for 40 minutes at 325 degrees F. If you don’t use the Pebeo Vitrea paint, follow the instructions on the bottle that you do use.
Allow to cool completely and they’re ready to use! I added some twine and burlap ribbon around the mouth of each jar and used them to display fresh flowers.
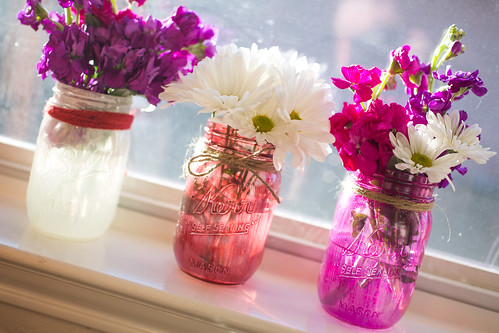

They would also be fun to use to store jewelry, bathroom items, or even knick-knacks.
What’s your favorite way to use mason jars?
Don’t miss some of my favorite Valentine’s Day projects!
Valentine Sandwich Cookies | Bubble Valentines | DIY Colored Mason Jars
Heart Crayon Valentines | Robot Heart Valentines | Play-Doh Valentines
Red Velvet Crinkle Cookies | GoGo squeeZ Valentines | Burlap Heart Garland
I love mason jars and those look so beautiful! Great color choices!
So pretty! Love this for Valentine’s Day
What a great way to dress up a rustic look!
Mason jars are so fun and giving them this added pop of color just makes them even more fun! Thanks for linking these up to Something Fabulous Wednesday. I was excited to see something from you there. 😉
those turned out beautiful!
Do you have any tips on how to make them less streaky? Or does that look go away once they are baked?
The Consulta ruc consultation allows you to verify official data, tax status, tax domicile and legal validity of individuals and companies registered in public administrative registries of the Peruvian tax system.
The Multas Por Placa system performs critical functions that directly affect millions of drivers every year. Ignoring it can cost you money, time, and stalled procedures.